Ontario's Plain-English Guide to Custom Home Building📞 705-533-1633 | ☎️ 1-866-868-6606 | ✉️ info@icfhome.ca
Raising a Cottage and Installing an ICF Foundation in Ontario: A Professional Guide
Raising a Cottage and Installing an ICF Foundation – What You Need To Know
Upgrading an old cottage with a new foundation is a major project that requires careful planning and professional execution. This guide walks through lifting a cottage, removing the old foundation, installing a new Insulated Concrete Form (ICF) foundation, and pouring a new concrete floor (with an option for radiant heating) – all within the context of Ontario, Canada. We’ll also cover typical costs, risks and challenges, and Ontario-specific code and permit considerations. Each section is organized for easy navigation, with clear steps and best practices used by professionals (no DIY approaches here).
Preparing for a Cottage Lift (Planning and Preliminaries)
Before any physical work begins, thorough planning and preparation are essential:
- Structural Assessment: Professionals start with an engineering assessment of the cottage’s structure. They ensure the building can withstand the lifting process (e.g. checking for rot in sill beams or weak joints) and plan reinforcement if needed. If the cottage is very old or fragile, engineers may recommend additional bracing of walls and frames to prevent damage during the lift.
- Site Preparation: The area around the cottage is cleared. Utilities (water, electricity, gas, septic) are disconnected or rerouted as necessary. For example, if plumbing or wiring runs through the foundation, those connections must be safely cut off before lifting. A temporary utility plan (like alternative power sources or holding tanks) might be set up for use during the project.
- Permits and Approvals: In Ontario, a building permit is required for raising a structure and replacing a foundation. The project plans (usually prepared by a structural engineer or qualified designer) must be submitted to the local building department for approval. The plans will detail how the house will be lifted, the new foundation design (including footings, wall specs, and reinforcement), and any changes to the structure. It’s crucial to check with the municipality and, if applicable, the local conservation authority (for waterfront properties) for any additional requirements. All work must comply with the Ontario Building Code (OBC) and local zoning – for instance, adding a full basement could affect the building’s height or required setbacks.
Best Practice: Professional house lifters and foundation contractors often coordinate with engineers and permit officials on the owner’s behalf. This ensures the lifting plan and new foundation meet safety standards and code requirements from the start. In Ontario, foundations generally must extend below the frost line (~4 ft or 1.2 m) to prevent frost heaving, so the new footing design will account for this depth. If the cottage is being converted from a pier foundation to a full basement, the plans may also need to include footing drains (perimeter weeping tiles) and damp-proofing, as required by OBC for habitable basements.
Lifting the Cottage: Professional Methods and Best Practices
Once planning is complete, the first major stage is lifting the cottage off its old foundation. This is a complex operation that should be done by experienced house-moving professionals. Key methods and steps include:
- Installing Temporary Support Beams: The lifting crew will slide long steel I-beams under the cottage. Typically, openings are made in the foundation walls (or the house’s skirting) to insert these beams. In some cases, floor joists are reinforced or sistered with additional lumber so they can distribute the weight to the steel beams. The beams are placed perpendicular to the floor joists or main structure, effectively taking over the load of the house.
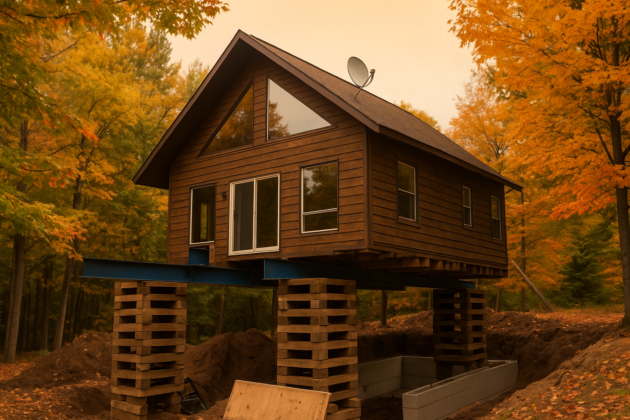
- Hydraulic Jacking and Cribbing: Heavy-duty hydraulic jacks are positioned under the steel beams (often at multiple points). The lifting is done slowly and evenly – usually raising the house only a few inches at a time, then adding cribbing (stacked timber blocks) under the beams to hold the gain, then resetting the jacks. This leapfrog process of jack-up and crib ensures the structure is always supported. Over hours (or days for very large structures), the house is jacked to the desired height. Professionals describe lifting a house without it falling apart as “an absolute science,” requiring subtle, incremental raises and careful monitoring. In one Ontario cottage lift, the structure was raised 15 feet and set on two giant steel beams and four sturdy timber crib towers(imagine the house sitting atop a stack of giant Jenga blocks). This height was exceptional (to create a new basement), but most lifts are just high enough to allow working room for foundation construction (often 3-8 feet of lift).
- Ensuring Stability and Safety: As the house is lifted, the crew constantly checks that it remains level. Dozens of points are measured to avoid twisting the frame. The best practice is to lift no more than about 6 inches at a time per jack station and to distribute the lifting evenly. The timber crib stacks are built up in tandem with the jacking so that at any pause, the house is securely supported on the cribs (not solely on the jacks). Workers will not go under the house unless it’s resting safely on cribbing. Safety is paramount – the area is kept clear, and only the trained crew is allowed near the jacking operation.
- Securing the Raised Structure: Once the final height is reached, the house is typically left resting on the cribbing stacks and steel beams for the duration of the foundation work. The jacks are removed or left idle as backup, and the structure is monitored over the first days to ensure everything remains stable. At this stage, the house is essentially “floating” above its original location, creating an open workspace beneath.
Professional Insight: Lifting companies in Ontario often use specialized synchronized hydraulic jacking systems that can lift multiple points at once, controlled by one technician to keep the building level. They will also typically have insurance and contingency plans given the risks. It’s common to hear that house lifting costs (just for the lifting process, not including new foundation) range from roughly $15,000 to $25,000 CAD for a standard-sized cottage. This cost covers the crew, hydraulic jack system, steel beams, and typically the placement of the cribbing. Very large or complex projects (or lifts to extreme heights) could cost more. In one discussion, a reputable Ontario contractor estimated about $10K–$12K just to lift and re-pier a small 20′×30′ cottage, while others noted $15K+ is reasonable for the lift in a larger full-foundation project.
Removing the Old Foundation (Block Walls and Concrete Floor)
With the cottage safely elevated and supported, attention turns to the demolition and removal of the existing foundation(often concrete block piers or walls, and any concrete slab or floor that exists). Professionals handle this step methodically:
- Debris Protection: First, the crew may lay down tarps or plywood in the work area to catch debris and protect the ground. They also ensure that falling rubble won’t damage the structure above – for example, by propping up temporary sheets of plywood along the underside of the house if needed.
- Masonry Takedown: If the cottage sat on block walls or piers, those masonry units are typically knocked out using sledgehammers or jackhammers. Starting from the top course, workers remove blocks layer by layer. Often, gravity helps once lower sections are removed – upper blocks will fall once their support is gone. In tight spaces, they might break the blocks into pieces for easier removal. All rubble is carried or wheelbarrowed out from under the cottage and piled for disposal.
- Breaking the Concrete Floor: Many older cottages have a thin concrete slab or pad as a floor (or just part of the area). This slab must be broken up and removed. Contractors use jackhammers or concrete saws to cut the slab into manageable sections. The pieces are then pried up and hauled out. If the slab was reinforced with wire mesh, they cut and pull that out as well.
- Excavation for New Footings/Basement: Once the above-grade foundation elements are gone, excavation equipment (if access allows) or manual digging will be used to reach the required depth for the new foundation footings. In Ontario, this means digging below frost line (approx. 4 ft deep) unless the new design is a shallow foundation with frost protection. Usually, for a full basement or deep crawlspace, a mini-excavator can be driven under the raised house to excavate soil. Alternatively, digging might be done from the sides if the house is high enough or if sections of the grade are open. Excavation includes not just removing soil to create space for footings and taller walls, but also clearing out around the perimeter for working room. The crew will typically over-excavate a bit to allow workers to stand and build forms or ICF blocks around the outside of where the new walls will be.
- Old Foundation Disposal: All the broken concrete and block debris must be disposed of. Dump trucks or bins are filled with the rubble for hauling away to a recycler or landfill. Disposal fees are factored into the project cost. Some contractors also crush and reuse old concrete as fill (if it’s clean and suitable), but this must be in line with engineering guidance.
Professional Tip: Care is taken not to disturb or undermine any temporary supports during excavation. Often, the cribbing towers for the house are placed just outside the line of the new foundation, or on interior high points, so excavation can proceed around them. If any temporary post is in the way of a new wall, the plan will include moving that support once portions of the new foundation are built enough to take load.
This stage can be labor-intensive. The cost for demolition and excavation work in Ontario will depend on complexity – a straightforward teardown of a small block crawlspace might be only a few thousand dollars (plus disposal fees), whereas digging out a full basement under a house could be $10,000 or more with equipment time. Often, foundation contractors bundle this removal and excavation cost into the foundation installation package. For example, the price of an ICF foundation (discussed next) usually includes the site excavation and prep. Always get clarity from the contractor on what’s included.
Installing the New ICF Foundation Underneath
With the site clear and excavated, the core of the project is constructing a new foundation using Insulated Concrete Forms (ICF). An ICF foundation consists of modular foam blocks that stack together and are then filled with concrete, creating a steel-reinforced concrete wall that stays insulated. Here’s how professionals install an ICF foundation under a raised cottage:
- Footings Construction: Just as with any foundation, solid concrete footings are poured first. Trenches are dug at the correct depth and width around the perimeter (and under any planned interior load-bearing posts). Forms are set if needed, and rebar is placed according to the engineering specs (usually two or more horizontal rebars in a strip footing). The concrete for footings is poured and allowed to cure for a short period. In some cases, if the soil is very stable, pre-cast footing pads or an enlarged slab edge is used, but typical practice is poured concrete footings below frost depth. Inspection: An Ontario building inspector will usually check the footing forms and rebar before the pour, as part of permit compliance. After pouring, the footing must reach sufficient strength before building the wall forms on it (often a few days).
- Setting ICF Blocks: Once footings are ready, the insulated concrete form blocks are brought in. These blocks are like large, hollow Lego pieces made of rigid foam (expanded polystyrene). They interlock as they are stacked to create the shape of the foundation walls. Professionals will snap a chalk line or otherwise mark the exact wall layout on the footings, then begin stacking the first course of ICF blocks along the lines. Subsequent courses are stacked in a running bond pattern (staggered joints) to maximize strength. The foam blocks are lightweight, which makes it relatively quick work to carry and place them. As blocks are stacked, plastic ties built into the forms hold the inner and outer foam panels together and provide slots for rebar. Openings for windows (if a full basement with egress windows) or access vents (for a crawlspace) are boxed out during the stacking, and any required beam pockets or service penetrations can be planned at this stage as well.
- Reinforcing and Bracing: As the ICF blocks go up course by course, workers insert steel reinforcing bars (rebar) vertically and horizontally inside the forms per the engineer’s design. Typically, horizontal rebar is placed in every second or third course of block, and vertical rebars are set into the footings and tied in as the wall rises. The OBC has specific requirements for reinforcement of ICF foundation walls (e.g. minimum rebar sizes and spacing based on wall height and soil pressure) buildingcode.online. After reaching the full wall height (commonly 8 feet for a basement), the crew installs a bracing system. This usually involves vertical bracing frames attached to the forms (which also serve as scaffolding for the workers during the pour). The bracing ensures the walls are plumb and won’t shift when the concrete is placed.
- Pouring the Concrete Walls: With forms and rebar in place and braced, the next step is to pour concrete into the ICF forms. A pump truck is typically used to place the concrete because it can carefully control the flow into the tall forms. The concrete is usually a specific mix (often 25 MPa or higher for foundations, with small aggregate if using narrow forms) and is poured in lifts – e.g. filling the wall halfway around, then going up to the top – to avoid excessive pressure at the bottom. Workers will use internal vibrators or simply tap the forms to eliminate air pockets and ensure the concrete fills all voids. It’s crucial to avoid overfilling or pouring too fast, which could burst a form seam. Done correctly, the concrete flows into all corners and around rebar, creating a solid wall inside the foam shell. Any anchor bolts or anchor straps that need to be embedded for the future connection of the house are placed into the wet concrete at the top of the walls (commonly, pressure-treated sill plates will be anchored to the new wall later to secure the cottage). The concrete is then left to cure. In the Cottage Life project example, after the concrete foundation was placed, the crew had to wait about 10 days for it to cure sufficiently before the house could be lowered onto it.
- Waterproofing and Drainage: Once the concrete has cured, the new ICF foundation walls are treated with waterproofing on the outside. Professionals in Ontario commonly apply a damp-proofing membrane or coating on the below-grade portions of the foundation (for example, a peel-and-stick bitumen membrane, or a dimpled drainage board). ICF foam is actually convenient to waterproof – materials can be applied directly to the foam exterior. Additionally, a perimeter drain (weeping tile) is installed at the footing level, leading to a sump pit or daylight if grading allows, to channel groundwater away – this is critical for Ontario basements due to wet conditions and is generally required by code. If the cottage is near a lake or in a high water table area, extra care is taken for drainage (like adding a sump pump).
- Backfilling: After waterproofing, the outside excavated areas are backfilled in layers. Usually, clear stone or gravel is used immediately around the weeping tile and up alongside the foundation to promote drainage, then soil is filled in. The backfill is done carefully to avoid damaging the new walls – the bracing often stays on until a certain amount of backfill is placed. The fill is compacted in layers to reduce future settling. If the project included creating a full-height basement, the grade might be re-shaped and new exterior access (like digging for a basement walkout or new steps) might be part of the plan.
At this stage, the cottage is still sitting on cribbing and beams, but now a brand-new foundation sits beneath it, ready to accept the structure. The final steps will be to tie the two together.
Cost Considerations: The cost of installing an ICF foundation in Ontario can vary with size and complexity. For a typical home-sized foundation (say 1000 sq. ft. footprint with 8-foot walls), estimates range widely. One industry source estimates $20,700 to $38,000 CAD for an ICF foundation (materials and labor) for an average project. This usually includes the ICF blocks, concrete, rebar, and labor to build and pour, as well as excavation and backfill. In Ontario, material costs might be a bit higher; ICF blocks might run around $7–$9 per square foot of wall area, rebar and concrete another ~$10+ per sq.ft. of wall, plus labor and other supplies. All-in-all, ICF foundations tend to cost slightly more than poured concrete walls (perhaps 5%–10% morefoxblocks.com), but they include insulation and can save time. If the new foundation is a deep basement with taller walls, extra engineering or stronger concrete mixes may add cost. It’s wise to get detailed quotes – some Ontario foundation contractors price by linear foot of wall or by the square foot of floor area. As a rough example, if your cottage is small (e.g., 20′×30′ footprint), the foundation installation (excluding the lift) might be on the order of $30k–$50k. Larger cottages (or higher-end ICF products) will scale up from there.
Pouring the New Concrete Floor (with Optional Radiant Heating)
With new foundation walls in place, the project now involves constructing the new floor inside the foundation. There are two common scenarios: a crawlspace (in which case a thin slab or even just a vapor barrier and gravel might be used), or a full basement floor slab. We’ll focus on the full concrete floor slab, as the question notes adding a concrete floor and possibly radiant heating:
- Preparing the Base: Inside the foundation, the ground is leveled and any remaining loose soil from excavation is removed. A layer of crushed stone (gravel) is placed throughout the floor area to create a stable base and help drainage under the slab. This gravel layer might be 4–6 inches thick, compacted flat. If plumbing lines or sump pits need to be installed (for a future bathroom or for the perimeter drain outlet), those are roughed in at this stage – trenches are dug in the gravel for any pipes, which are then covered.
- Insulation and Vapor Barrier: In Ontario, the building code and good practice call for under-slab insulation, especially if the slab will be heated. Rigid foam insulation boards (often 2″ extruded polystyrene, R-10) are laid on the gravel across the floor area. This insulation prevents heat loss into the ground and also avoids cold floors. On top of the insulation (or directly on gravel if not insulated), a thick plastic vapor barrier sheet is laid to stop ground moisture. The vapor barrier (typically 6-mil poly) is overlapped and taped at seams and run up the walls slightly. It’s important for controlling moisture and soil gases (Ontario now often requires a sub-slab depressurization rough-in for radon gas in new constructions – a perforated pipe in the gravel connected to a vent stack).
- Installing Radiant Heat Tubing (Optional): If hydronic radiant floor heating is planned, this is the time to install it. PEX tubing circuits are laid out across the floor area in a serpentine pattern, usually tied to a wire mesh or clipped to the insulation boards. The tubing is kept at a consistent spacing (commonly 6–12 inches apart) to ensure even heat. The circuits are then pressure-tested to make sure there are no leaks before the pour. If no radiant heat is planned, the crew might still put welded wire mesh or rebar in the slab for reinforcement, depending on engineering specs.
- Pouring and Finishing the Slab: Ready-mix concrete is poured onto the prepared base (over the vapor barrier and insulation, encasing the radiant tubes if present). Typically a 4″ thick slab is standard for a basement floor. The concrete is spread and leveled with rakes and straightedges (screeded). If radiant tubing is present, the crew must be careful not to dislodge or damage the tubes while spreading concrete. After initial setting, the slab is troweled smooth – for a basement, a power trowel may be used to get a nice finish if it’s going to be a usable space. Control joints may be cut into the slab to control cracking, or they might pour it in sections with intentional breaks. The slab is then left to cure. It’s usually walkable within 24-48 hours and fully cured in about 28 days, but construction can often continue on it after a few days with caution.
- Curing and Protection: Curing compounds or simply keeping the slab damp (covering with plastic) may be done to ensure the concrete cures strong without surface cracking. If it’s summertime, curing is critical to avoid the slab drying too fast; in winter, heating or insulating blankets might be needed to ensure the slab cures and doesn’t freeze.
Radiant Heating Note: Hydronic radiant floors are a popular upgrade for cottages, as they provide efficient, even heating. The installation cost in Ontario can add roughly $5–$10 per square foot of floor for the tubing, manifolds, and insulation (not including the boiler or heat source) – for example, $5k–$10k extra for a 1,000 sq. ft. basement is a ballpark. Once installed and the slab poured, the tubing will later be connected to a heating system (like a propane boiler or electric water heater with appropriate controls). The result is a warm floor which can turn the new basement into comfortable living space year-round.
Costs: The concrete floor pour itself is usually a smaller part of the budget. Expect around $7–$15 per square foot for a finished concrete slab in Ontario (lower end for plain slab, higher if including reinforcement, insulation, radiant tube labor, finishing, etc.). For example, a 800 sq. ft. basement might cost on the order of $6,000–$10,000 for a new insulated slab with radiant heating pipes, done by professionals. This would include materials (concrete, insulation, poly, rebar/tubes) and labor to form, pour and finish.
Lowering and Reattaching the Cottage
Once the new ICF foundation walls and floor slab are completed and have achieved sufficient strength, the house can be lowered onto the new foundation:
- The lifting crew returns to carefully reverse the jacking procedure. They will remove some cribbing and use the jacks to lower the house in small increments onto the prepared sill plate of the new foundation. A common approach is to install treated wood sill plates (usually 2×6 or 2×8 lumber) on top of the new concrete walls, anchored with bolts to the concrete. These plates have been shimmed or leveled as needed and align with the house structure. As the house comes down, the goal is for the bottom of the house (the rim joists or beams) to gently touch down evenly onto these sill plates.
- The process is essentially the reverse of lifting: the house is lowered a bit onto jacks, cribbing is removed in steps, and the jacks gradually let it down fully. This requires just as much care to keep the building level and prevent jolts. The crew will continuously monitor all sides to ensure the house is settling correctly onto the new foundation. It’s a moment of high precision – one professional described it like docking a shuttle to a space station, requiring skillful alignment.
- Once the house is seated, it is secured to the new foundation. This typically means attaching the wood framing to the sill plate and foundation: anchor bolts that were cast in the concrete are tightened, or steel straps/connectors are nailed to tie the framing into the concrete. This step ensures the house won’t shift off the foundation in high winds or over time. Any gaps between the old structure and the new foundation (for example, if the house’s frame isn’t perfectly flat) are shimmed and sealed.
- Finally, the remaining equipment (jacks, beams) is removed. The openings made in the siding or foundation for the beams are patched up. The house is now sitting permanently on its brand-new ICF foundation.
At this stage, the heavy construction work is done, but there will be follow-up tasks: reconnecting utilities (plumbers and electricians will run new lines as needed through the foundation to the house), potentially finishing the interior of the basement (insulating any exposed areas, framing walls, etc.), and landscaping or repairing any disturbances on the lot.
From a cost perspective, the lowering is usually included in the lifting contract (the $15–25k range mentioned earlier includes coming back to set the house down). After lowering, additional work like attaching utilities and finishing could add several thousand dollars more, depending on complexity.
Typical Professional Charges and Pricing Breakdown in Ontario
Every project will differ, but here is a breakdown of typical professional charges for raising a cottage and replacing its foundation in Ontario, based on industry data and contractor feedback:
- House Lifting (Jacking Up and Later Lowering): Cost: Approximately $15,000 – $30,000 for an average-size cottage. This covers the house moving company’s work: installing beams, jacking the structure, supporting it for the duration, and lowering it after the new foundation is done. Larger homes or complicated lifts (for example, very uneven terrain or a partial lift/shift) can cost more. (Source: RenoQuotes notes $15–25K for a standard lift; Ontario contractors quoted ~$10–15K for small cottages just to lift and level.)
- Foundation Removal & Excavation: Cost: Roughly $5,000 – $15,000, highly dependent on the amount of concrete to remove and how much digging is required. This usually includes demolition of existing piers/walls, breaking the old slab, and digging for new footings and greater depth. If a full basement is being excavated where there wasn’t one, costs trend to the higher side due to the volume of soil removal and disposal. If only a shallow crawlspace is needed, costs would be lower. (Often, this is built into the foundation contractor’s price – for instance, an ICF foundation quote might include excavation/backfill.)
- New ICF Foundation Installation: Cost: Approximately $30,000 – $60,000 for most projects (some could be less for a small crawlspace, or more for a large full basement). This range includes the materials (ICF blocks, concrete, rebar, waterproofing) and labor to build an insulated foundation, plus foundation contractor overhead and profit. According to Fox Blocks, a typical ICF foundation averages around $29Kfoxblocks.com, but Ontario’s prices can fluctuate. A simple crawlspace (shorter walls) might be on the lower end; a full basement with 8-foot insulated walls and maybe some custom features (openings, beam pockets) would be on the higher end. Remember that this also accounts for things like forming and pouring footings, damp-proofing, and installing drains.
- Concrete Floor Slab (with optional radiant heat): Cost: Generally $7,000 – $15,000 for an average basement area. On a per-square-foot basis, unheated slabs might be ~$8/sq.ft in Ontario, and heated slabs (with tubing, insulation, etc.) could be ~$12–$15/sq.ft. So, a 800 sq.ft. basement floor with insulation and radiant tubes might cost around $10k. This includes gravel prep, insulation, vapor barrier, tubing install, concrete pour and finish. If the project only requires a crawlspace slab (which might be just a thin “rat slab” or even just poly + gravel), that cost would be much less.
- Other Costs: Don’t forget permit fees (perhaps $1,000 or so, depending on municipality and project size), engineering/design fees (maybe $2,000–$5,000 for stamped plans and inspections by an engineer for the lifting and new foundation), and utility reconnections or upgrades. If the cottage’s plumbing, septic, or electrical systems need modifications for the new basement, licensed trades will charge for that work separately. Also, if adding features like basement insulation and drywall, interior framing, windows, exterior waterproofing upgrades, sump pump installation, etc., those will each have costs. In some cases, a general contractor will manage the entire project for a percentage fee.
For context, Ontario contractors have indicated that a complete foundation replacement project can run in the hundreds of thousands for a large home, but for a small cottage you might be looking at roughly $100,000 to $150,000+ overall. In one forum, contractors quoted about $120K to $150K for lifting a 440 sq.ft. cottage and putting in an insulated crawlspace. That included everything (permits, lifting, new foundation, addition footings, etc.). Each project is unique, so these figures are only guidelines – obtaining detailed quotes from professionals is essential for an accurate budget.
Common Risks and Challenges in Raising a Cottage and Replacing its Foundation
Undertaking a cottage lift and foundation replacement comes with several risks and challenges. Professionals work to mitigate these, but owners should be aware of them:
- Structural Risks to the Building: Lifting a house can put stress on the structure. If not done evenly or if the building is fragile, things can go wrong. Common issues include cracked plaster or drywall, doors or windows jamming or breaking, and even structural framing members cracking. One source humorously (and accurately) noted that potential problems when jacking a house include “windows shattering, door frames twisting, plumbing and electrical being stretched and coming loose or snapping.” reddit.com Professionals mitigate this by going very slowly and often recommending removal of glass windows or making other preparations (e.g., flexing slack into wiring) if a big lift is planned. Still, minor damage (like drywall cracks) is fairly common and can be repaired afterward.
- Weather and Site Conditions: In Ontario, weather can be a significant challenge. Heavy rain can flood an open excavation or cause soil collapse around a dig. Cold weather (frost) can complicate concrete curing and excavation (frozen ground). Professionals plan the timing – for instance, trying to pour concrete in the warmer months or tenting and heating the area if doing winter work. Weather delays are possible, and a raised house on cribbing is more exposed to wind, so monitoring and securing the site is critical. Sudden storms when a house is lifted could be dangerous, so crews often schedule lifts with a close eye on the forecast.
- Soil and Water Issues: Many Ontario cottages are near lakes or on lots with a high water table. Excavating for a new basement may encounter groundwater or spring runoff, requiring sump pumps on site during construction to keep the area dry. There’s also a risk of soil instability – if the soil is sandy or loose, cribbing must be set on secure pads to prevent sinking, and excavation might require shoring to prevent cave-ins. Unknowns like big boulders or bedrock can also be encountered when digging, which might necessitate blasting or redesign (which adds cost and complexity).
- Logistics and Access: Getting heavy equipment and materials in place at a remote or tight cottage lot can be tricky. Large hydraulic jacks and steel beams need clearance. If the cottage is in a tight neighborhood or on an island, special equipment like barges or cranes might be required. Limited road access might limit the size of concrete trucks, etc., which can introduce challenges (like needing pump trucks or scheduling many small concrete loads).
- Delays and Coordination: This type of project has multiple phases and teams (lifters, excavators, foundation crew, concrete finishers, plumbers, etc.). Coordination is crucial. Any delay in one phase (for example, permit holdups, inspection scheduling, or concrete delivery issues) can idle the entire project. Professionals try to schedule things tightly: for example, lifting on week 1, excavation and footings week 2, foundation walls week 3, etc. – but delays happen. A common challenge is waiting for concrete to cure – one cannot rush this without risking the integrity of the foundation. In the interim, the homeowners might not be able to occupy the cottage, which is an inconvenience (in one project, the owners had to vacate for over a week while concrete cured).
- Cost Overruns: Unexpected problems (like discovering the cottage sill beam is rotten and needs replacement, or finding out the old foundation had asbestos insulation that needs abatement) can increase costs. It’s wise to have a contingency budget.
- Safety Risks: Lifting and working under a house is dangerous if not done properly. Professionals carry insurance and follow safety protocols, but accidents (though rare) can be catastrophic (equipment failure, collapse of cribbing, etc.). Using a reputable, experienced house moving company greatly reduces this risk. All workers need to be vigilant about not going under an inadequately supported structure and using protective gear, especially when demolishing old concrete (flying debris, dust) or handling heavy materials.
- Permitting and Legal Challenges: Sometimes permitting itself can be a challenge – if the cottage was non-conforming (grandfathered under old rules), raising it or altering it might trigger requirements to bring other aspects up to code. For example, if you turn a 50-year-old cottage on piers into a full-time dwelling with a basement, the building department might require that certain other systems (like septic capacity or railing heights, etc.) be upgraded. There could also be zoning issues: adding a taller foundation might technically increase the building’s height beyond what’s allowed in a cottage area. Early consultation with local authorities can identify these issues. Additionally, any work near water might need conservation authority permission to ensure you’re not affecting floodplains or shorelines. All these regulatory angles must be managed to avoid fines or orders to stop work.
Despite these challenges, professional contractors are well-versed in handling them. Proper engineering, careful work practices, and adherence to code and safety standards will mitigate most risks. It’s important for the homeowner to maintain open communication with the project manager and be prepared for a longer timeline if surprises occur.
Ontario-Specific Building Code Considerations and Permit Requirements
Ontario has strict building codes and regulations that come into play for foundation projects. Here are some key Ontario-specific considerations and requirements:
- Building Permits: As mentioned, a building permit is mandatory for this scope of work. The permit application will require construction drawings detailing the new foundation (footing sizes, wall specifications, drainage, etc.) and often a description of the lifting method. Many municipalities in Ontario will only issue the permit if the plans are stamped by a Professional Engineer or a licensed BCIN designer, especially since lifting a house is considered a structural alteration. Inspections will be scheduled at various stages: usually after footing preparation, after foundation wall completion (before backfill), and after completion of the project. The inspectors will verify compliance with the Ontario Building Code.
- Ontario Building Code (OBC) Requirements: The OBC has specific sections (Part 9 for housing/small buildings) that govern foundations. Important points include:
- Frost Protection: Foundations must extend below the frost line (around 1.2 m or 4 feet in most of Ontario), or otherwise be designed with frost protection (like insulation for shallow foundations). This means your new footings will be at least 4 ft deep, often more if adding a basement.
- Foundation Wall Structure: The OBC permits ICF foundation walls and has tables for the required thickness and reinforcement based on soil height against the wall. Typically, a 8″ concrete core is common for basement walls, but engineering can allow 6″ cores for certain heights. OBC Article 9.15.4.2 will require that ICF foundation walls are laterally supported at top and bottom (the floor system of the house provides the top support once reattached, and the footing the bottom support) thebuildingcodeforum.com. The code also limits wall height unless specifically designed – standard is around 8’–9’ basements; taller walls may need an engineer’s design.
- Insulation and Energy Efficiency: Ontario’s energy code (SB-12 for housing) will require the new foundation to meet minimum insulation levels. ICF walls usually meet or exceed these for basements (ICF often has an effective R-value that more than satisfies code). The floor (if it’s a heated slab) may also require insulation underneath by code. Edge thermal breaks might be required in some cases to prevent heat loss at the slab perimeter.
- Radon Gas Protection: Ontario code now requires provisions for radon mitigation in new construction. For a new basement slab, this typically means a capped conduit from beneath the slab (in the gravel) up to a location where a future fan could be installed, or at least a rough-in. This is something an Ontario builder will incorporate by default.
- Fire Protection of Foam: If the interior of the ICF (foam) is exposed in a usable space, it must be covered with a thermal barrier (like 1/2″ drywall) for fire safety. So if the basement is going to be used as a living area, you can’t leave the ICF foam exposed – you’d likely frame a perimeter wall inside and drywall it, or apply a suitable fire-rated coating. If it’s just an unfinished crawlspace for storage, this might not be required, but any service room or habitable area needs the fire protection per OBC.
- Ventilation and Vapor: For a crawlspace, OBC may require ventilation openings or an insulated, air-sealed space depending on if it’s conditioned. If the new foundation creates a crawlspace rather than a full basement, you have options: vent it to the outside (with required vent sizes per code) or make it a conditioned space (insulate the walls, not the floor above, and heat it minimally to avoid moisture issues). Building code has specifics for crawlspace insulation and venting in Section 9.18.
- Egress and Exits: If the new foundation is a full basement that will be finished or has bedrooms, code requires egress windows (minimum size and opening) or other exits. Usually at least one egress window is required in a basement if there are any sleeping rooms, and a certain size window for emergency escape in any basement living space. This might influence the design (you might include a large window well and window when building the ICF walls).
- Zoning and Other Local Regulations: While not part of the building code, local zoning bylaws in Ontario communities can affect this project. For example, if the cottage is in a regulated shoreline area, there could be rules about altering the building’s location or height. Even raising the cottage to put a foundation could be seen as increasing the building’s height above grade. Most areas have a maximum height for structures – if the cottage was one storey on piers and now effectively becomes taller with a basement, it should still usually comply, but it’s something to confirm. Additionally, if the footprint is being expanded or if an addition is planned in tandem, setback rules apply. The permit process will usually flag these issues; sometimes a minor variance approval might be needed if, say, the cottage was very close to a lot line and the new foundation slightly changes that condition.
- Utilities and Septic: Ontario law will require that if you are making the cottage a full-time dwelling or adding plumbing fixtures (like a basement bathroom), the septic system must be adequate for the load. Replacing a foundation doesn’t directly trigger a septic review unless plumbing is added or moved, but it’s something to keep in mind – an old septic might need an upgrade if a basement bathroom or laundry is added. Electrical service might need to be temporarily disconnected and later reconnected by the utility with an inspection (ESA – Electrical Safety Authority – in Ontario would inspect any changes to the electrical). All gas work (if any) needs a TSSA-certified gas fitter. These are parallel considerations to the main project.
Permit Process: Expect to submit a detailed application and wait perhaps a few weeks for approval. You’ll pay a fee based on project value or area. During construction, inspectors from the municipality will visit at key points. At completion, you may need a final inspection to close the permit, confirming that the house is safely on its new foundation and all code requirements are satisfied.
Undertaking this project in Ontario means working within a well-defined regulatory framework. The good news is that if you follow it, you’ll end up with a foundation that is strong, safe, and long-lasting, and a cottage that likely increases in value and usability (no more “slanty shanty” on wobbly piers!).
Conclusion
Raising an existing cottage to replace its foundation with an ICF foundation is a complex but rewarding project. By using professional house lifters and experienced foundation contractors, cottage owners can achieve a solid, insulated foundation that brings their old structure up to modern standards. The process involves careful planning, methodical execution in stages (lift, remove, rebuild, lower), and attention to local Ontario building codes and regulations. While the costs are significant and the risks must be managed, the result is a safer, more comfortable, and more valuable cottage that will stand on a strong foundation for decades to come. With the information in this guide, you can approach such a project with a clear understanding of each step – from jacking up the cottage, to pouring that final smooth concrete floor – and with realistic expectations about professional methods, costs, and requirements in the Ontario context. Enjoy your “new” cottage once it’s back on terra firma, now better than ever from the ground up!
We’d love to hear your thoughts! Please leave a comment below if you agree, disagree, or have any questions about the topic. If you need additional information or want to continue the conversation, don’t hesitate to contact us. For more insights and how-to guides, feel free to explore the links below or head over to our “The Workbench” page. We look forward to hearing from you!
Latest posts
Fresh guides, calculators, and “don’t-do-that” tips
Scroll sideways to see more. Cards stay the same height (no messy uneven rows).
Loading latest posts…
Tip: shift + mousewheel works great